Post by Blaze on Jan 18, 2010 22:12:28 GMT -5
Hello and welcome to Shadow's photoshop tutorials! I hope that I can help and teach you guys so new tricks because learning is half the battle!
The first tutorial will be about making realistic or 3D rendered looking stuff. Like my Shockwave and Lightning Saix
For this demonstration, I'll be using this pic of TFA Megatron (cuz it's all I have atm). It really doesn't matter because the things used to make a 3Dish transformer is EXACTLY the same as making a 3D zoid.
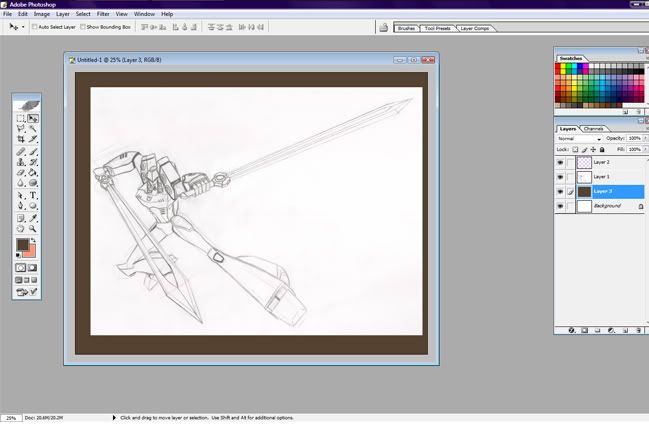
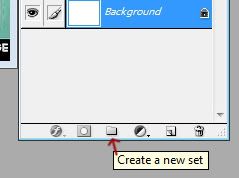
So to start out, I scanned in my picture and copied/paste it in a new document. Next is to create a new group folder, aka a set. This makes organization easy. After you created your new set folder, create a new layer inside of it. Now we're ready to color. BE SURE TO CREATE A NEW LAYER FOR EVERY NEW SHAPE.
Pen Tool
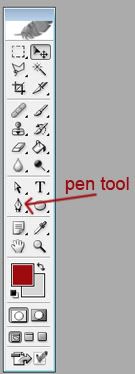
Ah the pen tool. Probably the best tool in the photoshop arsenal. It's the basis for learning how to create 3D looking objects and saves a lot of hassle trying to make straight lines via wacom. I just use mouse for these things (actually I'm wacom-less right now :<)
Pen tool's keyboard shortcut is p. To use the pen tool, first click a spot where you want to start. This creates and anchor point (that little square). Next click the where you want to make the next point and hold down the button. While holding the button down, you can drag the handles and create curves. Once you get the curve where you want it, release the button. Click the next point and repeat the process until you have the first shape completely enclosed. After making a curved point, if you don't want the curve to flow into the next point you make, place the cursor over the curve point and press the alt key. This will turn add a upside down v with the pen tool icon. Click the point while holding the alt key will turn the point into a regular square anchor.
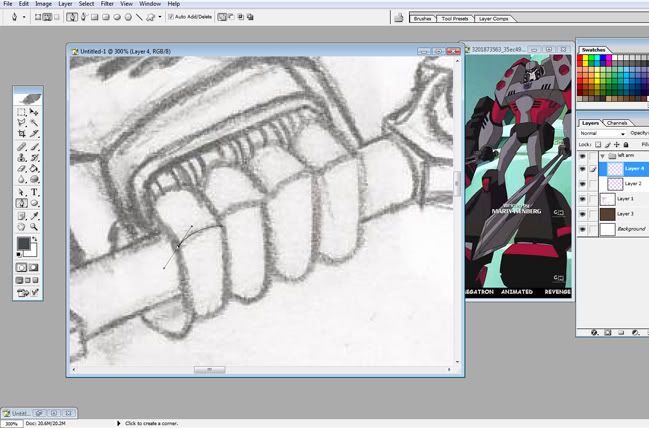
This is after you enclose the shape with the pen tool:
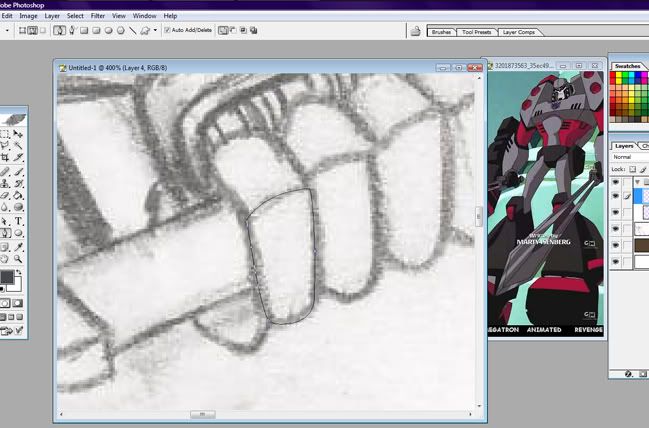
Now right click with the pen tool and select fill path in the menu:

The fill path dialogue box gives you a lot of choices, but you want to select foreground color, which should be the color you chose for this shape.

Ta-da! The shape is now filled with that color. To get rid of the path, just press the enter key while still having the pen tool selected. Now it's time to shade. There's many ways to do this, but I just use the good old burn and dodge tools. Burn will make the color darker and dodge will make it lighter. I usually have my burn tool set to midtones and dodge set to highlights, but mess around with them to see how the different settings look.

After using the burn tool:
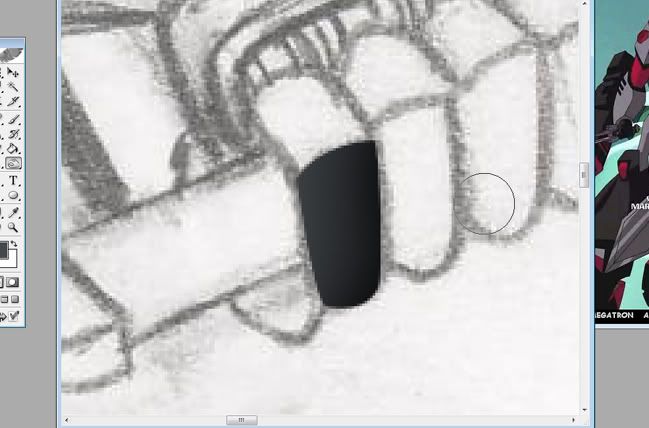
Then use the dodge after the burn. (Doesn't matter which you do first, burn or dodge)
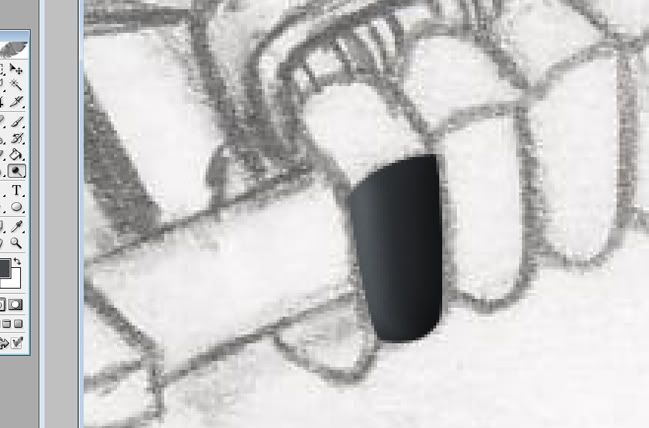
Now just repeat that process to make the rest of your shapes!
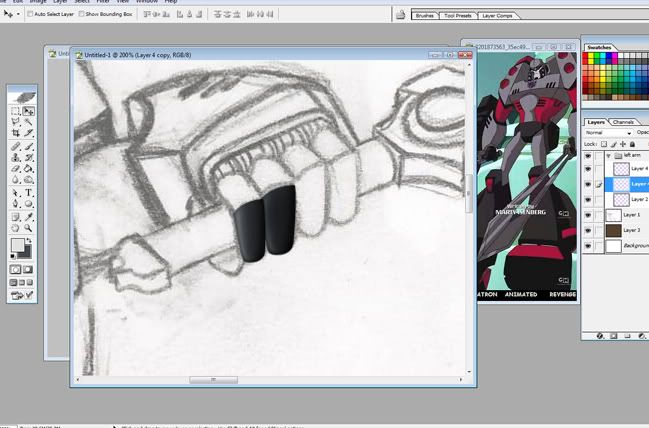
Ellipses and Adjusting Paths
Any kind of ellipse is hard to get perfect with the pen tool first time around. Luckily there's a tool that allows you to go back and adjust any of the points called the direct selection tool.
Ok, so started this part of the sword whereI think it has the red circle piece. Made the red ellipse with the circle tool, then shaded it some with the burn/dodge. Had to make the ellipse underneath with the pen tool since it's not actually a perfect ellipse.
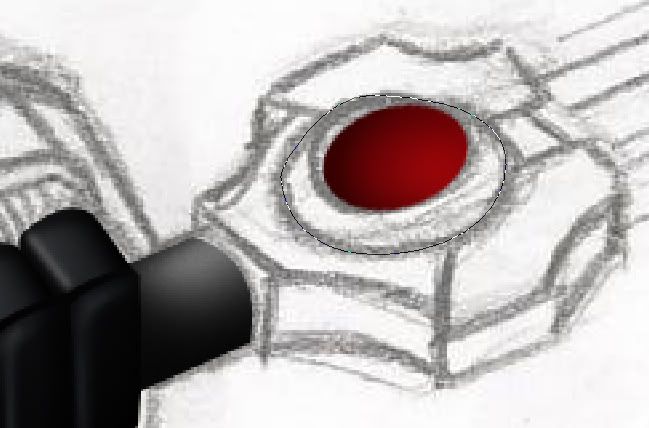
Now, to adjust the path. Select the direct selection tool and click on the path. This shows all the anchor points and curve handles. With this tool, you can click on any of the points or handles and readjust them.

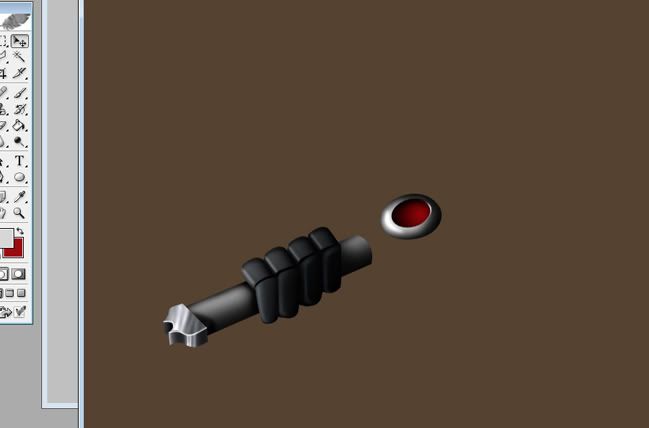
Now that I fixed my ellipse and shaded it, it's still not complete. The red piece needs some more shading and there needs to be a slight curve in to show the red is down inside the silver piece.
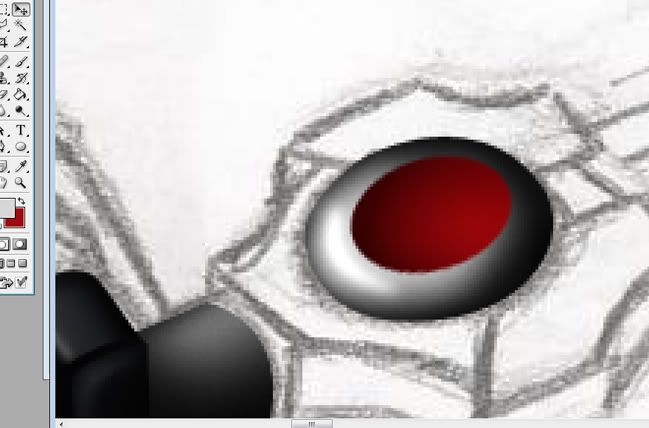
Created the curve with the pen tool:

Shaded the curve and turned off the layer with the outline so I could see how the image is looking.
A Different Edge
This is going to show I will use the pen tool to create a different kind of edge instead of having that hard edge.

Use the pen tool and trace it along the edge

Right click and select stroke path this time instead of fill

In the stroke dialogue box, select brush from the drop down menu. Then click ok.
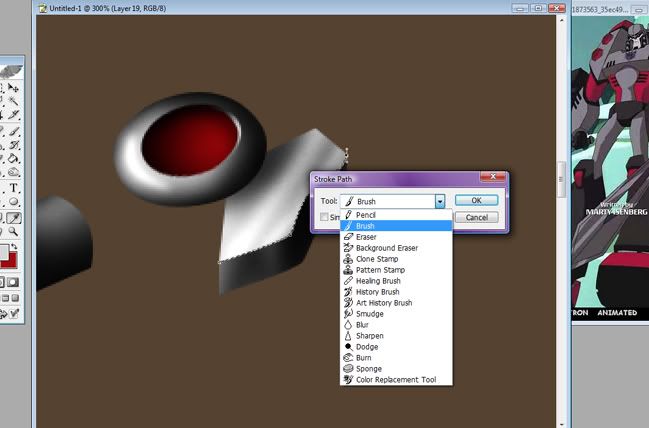
Again press enter to delete the path and you now have a nice stroke. The stroke size depends on what size the brush tool is set at.
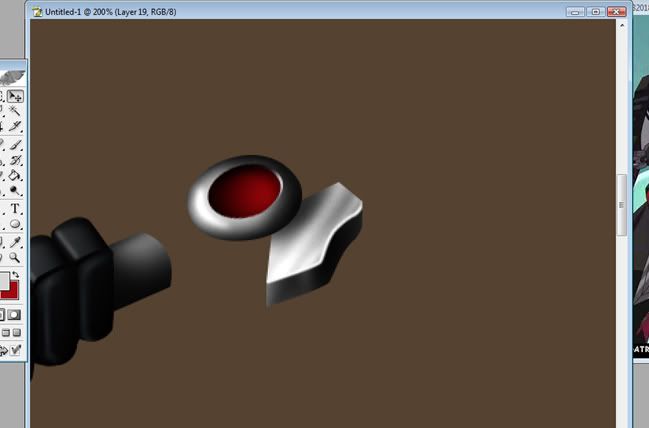
You can also use the same technique to create a soft edge. After you made the stroke, blur it with the blur tool or use a Gaussian blur and the edge will appear curved.
Well that's all I have for right now. Hope this helped some. I'll be sure to add on as I continue coloring this pic ;3
The first tutorial will be about making realistic or 3D rendered looking stuff. Like my Shockwave and Lightning Saix
For this demonstration, I'll be using this pic of TFA Megatron (cuz it's all I have atm). It really doesn't matter because the things used to make a 3Dish transformer is EXACTLY the same as making a 3D zoid.

So to start out, I scanned in my picture and copied/paste it in a new document. Next is to create a new group folder, aka a set. This makes organization easy. After you created your new set folder, create a new layer inside of it. Now we're ready to color. BE SURE TO CREATE A NEW LAYER FOR EVERY NEW SHAPE.

Pen Tool

Ah the pen tool. Probably the best tool in the photoshop arsenal. It's the basis for learning how to create 3D looking objects and saves a lot of hassle trying to make straight lines via wacom. I just use mouse for these things (actually I'm wacom-less right now :<)
Pen tool's keyboard shortcut is p. To use the pen tool, first click a spot where you want to start. This creates and anchor point (that little square). Next click the where you want to make the next point and hold down the button. While holding the button down, you can drag the handles and create curves. Once you get the curve where you want it, release the button. Click the next point and repeat the process until you have the first shape completely enclosed. After making a curved point, if you don't want the curve to flow into the next point you make, place the cursor over the curve point and press the alt key. This will turn add a upside down v with the pen tool icon. Click the point while holding the alt key will turn the point into a regular square anchor.

This is after you enclose the shape with the pen tool:

Now right click with the pen tool and select fill path in the menu:

The fill path dialogue box gives you a lot of choices, but you want to select foreground color, which should be the color you chose for this shape.

Ta-da! The shape is now filled with that color. To get rid of the path, just press the enter key while still having the pen tool selected. Now it's time to shade. There's many ways to do this, but I just use the good old burn and dodge tools. Burn will make the color darker and dodge will make it lighter. I usually have my burn tool set to midtones and dodge set to highlights, but mess around with them to see how the different settings look.

After using the burn tool:

Then use the dodge after the burn. (Doesn't matter which you do first, burn or dodge)

Now just repeat that process to make the rest of your shapes!

Ellipses and Adjusting Paths
Any kind of ellipse is hard to get perfect with the pen tool first time around. Luckily there's a tool that allows you to go back and adjust any of the points called the direct selection tool.
Ok, so started this part of the sword where

Now, to adjust the path. Select the direct selection tool and click on the path. This shows all the anchor points and curve handles. With this tool, you can click on any of the points or handles and readjust them.

Now that I fixed my ellipse and shaded it, it's still not complete. The red piece needs some more shading and there needs to be a slight curve in to show the red is down inside the silver piece.

Created the curve with the pen tool:

Shaded the curve and turned off the layer with the outline so I could see how the image is looking.

A Different Edge
This is going to show I will use the pen tool to create a different kind of edge instead of having that hard edge.

Use the pen tool and trace it along the edge

Right click and select stroke path this time instead of fill

In the stroke dialogue box, select brush from the drop down menu. Then click ok.

Again press enter to delete the path and you now have a nice stroke. The stroke size depends on what size the brush tool is set at.

You can also use the same technique to create a soft edge. After you made the stroke, blur it with the blur tool or use a Gaussian blur and the edge will appear curved.
Well that's all I have for right now. Hope this helped some. I'll be sure to add on as I continue coloring this pic ;3


